Monday, March 12, 2018

March Fun

March Card Class


Here is a look at the projects we created on Saturday.  I had lots of fun designing them and it appeared that my customers had fun putting them together.


This card is made using the Apron of Love bundle and the new Basketweave Embossing folder.  When I saw the embossing folder I knew that I had to make a pie with it.  The whole card was a lot of fun to make.


This card was made using the Crosses of Hope bundle and the new Springtime Foils designer series paper that was one of the February additions to the Sale-a-bration line for this year.  This is not really paper, but more of a cardstock weight, and is luscious!.  There are four awesome designs in this package of paper.


This card was made using the Charming Cafe bundle.  I don't normally make cards that only use white cardstock and don't have any layers, but I love this one!

This fun card was made using the Hedgehugs set in the Spring Occasions Catalog.  I love each of the characters in this set and it was a quick and easy card to make.

Here is a bonus for you!  Meet Buster.  He would really love to be my helper, but is not allowed on my craft surface.  Most of the time when I'm crafting he and I have several arguments regarding his boundaries.  I think this was his way of joining me the other day.

Thursday, December 14, 2017

Cards, 3-D Items, and a Cool Scrapbook Layout

Stamping Fun!


Here are a few things I've been working on lately.  All of these cards were created for our Stamp Club in the last few months.


This is a cute baby card.  When I first saw this stamp set I knew I had to make a baby card with the elephant.  He is just too cute!  The little elephant is in a window, and when you open the card you will see his cute little behind on the inside.  Supplies: Pink Pirouette, Melon Mambo, Smoky Slate, and Whisper White Cardstock; Blushing Bride 1/4" Double Stitched Ribbon; Memento Black Ink; A Little Wild Stamp Set; Little Loves Framelits; Stampin Write Markers.


This card was made for our December Stamp Club and is multi-purpose.  Supplies:  Very Vanilla & Early Espresso Cardstock; Wood Textures Designer Series Paper Stack; Layering Circles Framelits; 5/8" Burlap Ribbon; Metallic Enamel Shapes; Swirly Snowflakes Thinlits; Painted Autumn Designer Series Paper; Ribbon of Courage stamp set; Early Espresso Classic Ink.


This was one of our Christmas cards this month.  I've been wanting to make an eclipse card for several months and this is my version of it.  I think it turned out simple, but nice.  Supplies:  Whisper White & Basic Black Cardstock; Christmas Pines stamp set; Large Letters Framelits; Garden Green Classic Ink; Real Red 1/8" Solid Ribbon.

3-d Fun


Anyone who knows me well knows how much I love to make 3-d items.  As soon as I saw the Mini Pizza Boxes in the Holiday Catalog I knew I wanted to make one with an album in it.  Here is my take on it.


The center of the album has several pages for photos that flip up and the right hand side folds out accordian style to add more photos and journaling.  I had a ton of fun making this album and everyone at our Holiday Retreat did also.  Supplies:  Mini Pizza Boxes; Labels to Love stamp set; Foil Snowflakes; Everyday Label Punch; Layering Circles Framelits; Cardfront Builder Thinlits; Silver 3/8" Metallic Edge Ribbon; Envelope Punch Board; Cherry Cobbler & Whisper White Cardstock; Merry Little Christmas Designer Series Paper.


This is the second time I've made a sampler and I love them!  This one is 8 1/2" square and I made it without a frame, adding a cardboard easel to the back.  Supplies: Snowflake Sentiments & Oh What Fun stamp sets: Real Red & Old Olive Classic Ink; Real Red, Basic Black, Old Olive, & Whisper White Cardstock; Red Glimmer Paper; Be Merry Designer Series Paper; Stitched Shapes Framelits; Layering Ovals Framelits; Christmas Stocking Thinlits; Card Front Builder Thinlits; Santa's Sleigh Thinlits; Bunch of Banners Framelits; Basic Black 3/8" Shimmer Ribbon.

Fun on the Washington Coast


A few years ago my daughter gave us a weekend trip to Astoria for a Christmas present.  We saved it for summer time and visited in July.  It happened that we were in Astoria the same weekend as the Goonies movie anniversary celebration.  This didn't mean anything to me because I'd never seen the movie, but it did mean that there were lots of people every place we went.  The motel we stayed at had about 50 copies of the movie on hand so we watched it and found it to be pretty cute.

While there we spent a whole morning in the Maritime Museum.  It was a very interesting and educational visit.  We then drove over the bridge to check out the lighthouses at Cape Disappointment.  This layout shows just a few highlights of our fun that day.  The raccoon met us at our car in the parking lot and was very cute in his begging abilities.  I didn't give him any food, but he still didn't mind posing for a photo op.


Supplies:  Night of Navy, Sahara Sand, Soft Sky, Very Vanilla cardstock; Night of Navy, Soft Sky, Crumb Cake, So Saffron, Garden Green classic ink pads; High Tide & Brushstroke Alphabet stamp sets; Lots of Labels Framelits; Basic Black Stampin Write Marker.


Thursday, June 29, 2017

Fun New Tri-fold (sort of) Card

Fun New Fold


I recently participated in one of Ronda Wade's online Creative Conventions.  I love all of her classes and the card ideas she comes up with!  This card is a tri-fold of a sort.  It starts with a 12 x 5 1/2 sheet of Whisper White cardstock that is folded down to make a very cool 5 1/2 x 4 1/4" card. It was very hard to get a photo that shows the folds.  I used the new Whole Lot of Lovely dsp and the Beautiful Bouquet stamp set, as well as the Lots of Love stamp set.  The Beautiful Bouquet set has very cool words that go together for both the inside and the outside of the card.  I'll definitely be using this set a lot in the future!


Tuesday, May 30, 2017

June Stamp Club Sneak Peek!

Father's Day Card


This is a card we'll be making at our June Stamp Club.  Lovely as a Tree is my all time favorite Stampin' Up! stamp set and I love the way the card looks like there is a photo hanging on a wall, or that you are looking out through a window.  I had a different Father's Day card that we were going to make in our May Stamp Club, but had to cancel due to illness.  The card was made with retiring products, so it was back to the drawing board for me.  Let me know what you think of this card.


Supplies used:  Very Vanilla & Early Espresso Cardstock; Wood Textures DSP Stack; Early Espresso, Soft Sky, & Pear Pizzazz Classic Inks; Painter's Palette, Lovely as a Tree, & Thoughtful Banners stamp sets; Layering Ovals & Layering Squares Framelits; Linen Twine, Foam Adhesive Strips, Stampin Dimensionals, Stampin Sponge.

Sunday, January 29, 2017

Bringing Back Birthdays

Birthday Card Club


Birthdays are important to everyone.  Who doesn't love receiving a birthday card in the mail?  I think a physical card is much more meaningful than birthday wishes on Facebook, or in an ecard.  And, it's even more special if the birthday card is handmade.

So, to help bring birthdays back, I've started a Birthday Card Club.  Friday night was our first class and we made one birthday card and a birthday planner to keep track of those important days.  These photos are of the planner we created. I created the month pages using Microsoft Publisher.  The book includes one printed page for each month, as well as four lined pages after each month for keeping notes on the important people in our lives. The book was bound together using my Cinch machine.

We will be meeting on the 4th Friday night of each month.  Let me know if you would like to join us.  If you commit to a six month period you will receive a special gift from me.  You may also participate long distance by receiving the supplies in the mail each month.


Supplies used: (all supplies Stampin' Up!) Lift Me Up stamp set, Carried Away dsp (sale-a-bration), Stitched Shapes Framelits Dies, Up & Away Thinlits Dies, Island Indigo Ink, Pool Party 3/8" Stitched Ribbon.

Wednesday, January 4, 2017

Weekend Crafting & Stamp Club Sneak Peek

Weekend Crafting & Stamp Club Sneak Peek

Scrapbook Page

Here are a few things I've been working on lately.  I was going through some very old photos and found these pictures of Amber's 4th birthday party.  My mom made the doll house for her from a kit and she did an awesome job. (All supplies used on these projects are from Stampin' Up!)


Supplies used: Balloon Adventures stamp set, Balloon Pop-Up Thinlits Dies, Party Animal Designer Series Paper, Whisper White, Night of Navy, Emerald Envy, and Crushed Curry cardstock, Night of Navy, Emerald Envy, and Crushed Curry ink pad, Emerald Envy 3/8" Ruched Ribbon, Balloon Punch, Birthday Bright Project Kit, Thick White Baker's Twine, Rhinestones.

3-d Projects

Anyone who knows me well knows that 3-d projects are one of my passions.  I just love making this type of gift item!

This first 3-d project is a gift bag/gift card holder.  There is a cute folder inside that's made to hold the gift card, and the bag can also include a small gift or some candy.


Supplies used: Balloon Adventures stamp set, Balloon Pop-Up Thinlits Dies, Party Animal Designer Series Paper, Whisper White, Pacific Point, and Emerald Envy cardstock, Night of Navy ink pad, Emerald Envy Thick White Baker's Twine, Balloon Punch, Stitched Shapes Framelits Dies, Party Animal Embellishments, Rhinestones.

This next 3-d project is an explosion box.  This is the first time that I've made one and absolutely loved making it.  I think it looks pretty cool.


Supplies used: Balloon Adventures stamp set, Balloon Pop-Up Thinlits Dies, Party Animal Designer Series Paper, Whisper White, Pacific Point, Crushed Curry, and Emerald Envy cardstock, Night of Navy and Emerald Envy ink pads, Emerald Envy Thick White Baker's Twine, Balloon Punch, Blossom Punch, Stitched Shapes Framelits Dies, Party Animal Embellishments, Rhinestones.

Cards

These next three projects are cards we'll be making this Saturday at our stamp club.  I'm really loving all of the projects in the new Stampin' Up! Occasions catalog.  It goes live today and you can order through my online store at tamiweil.stampinup.net.

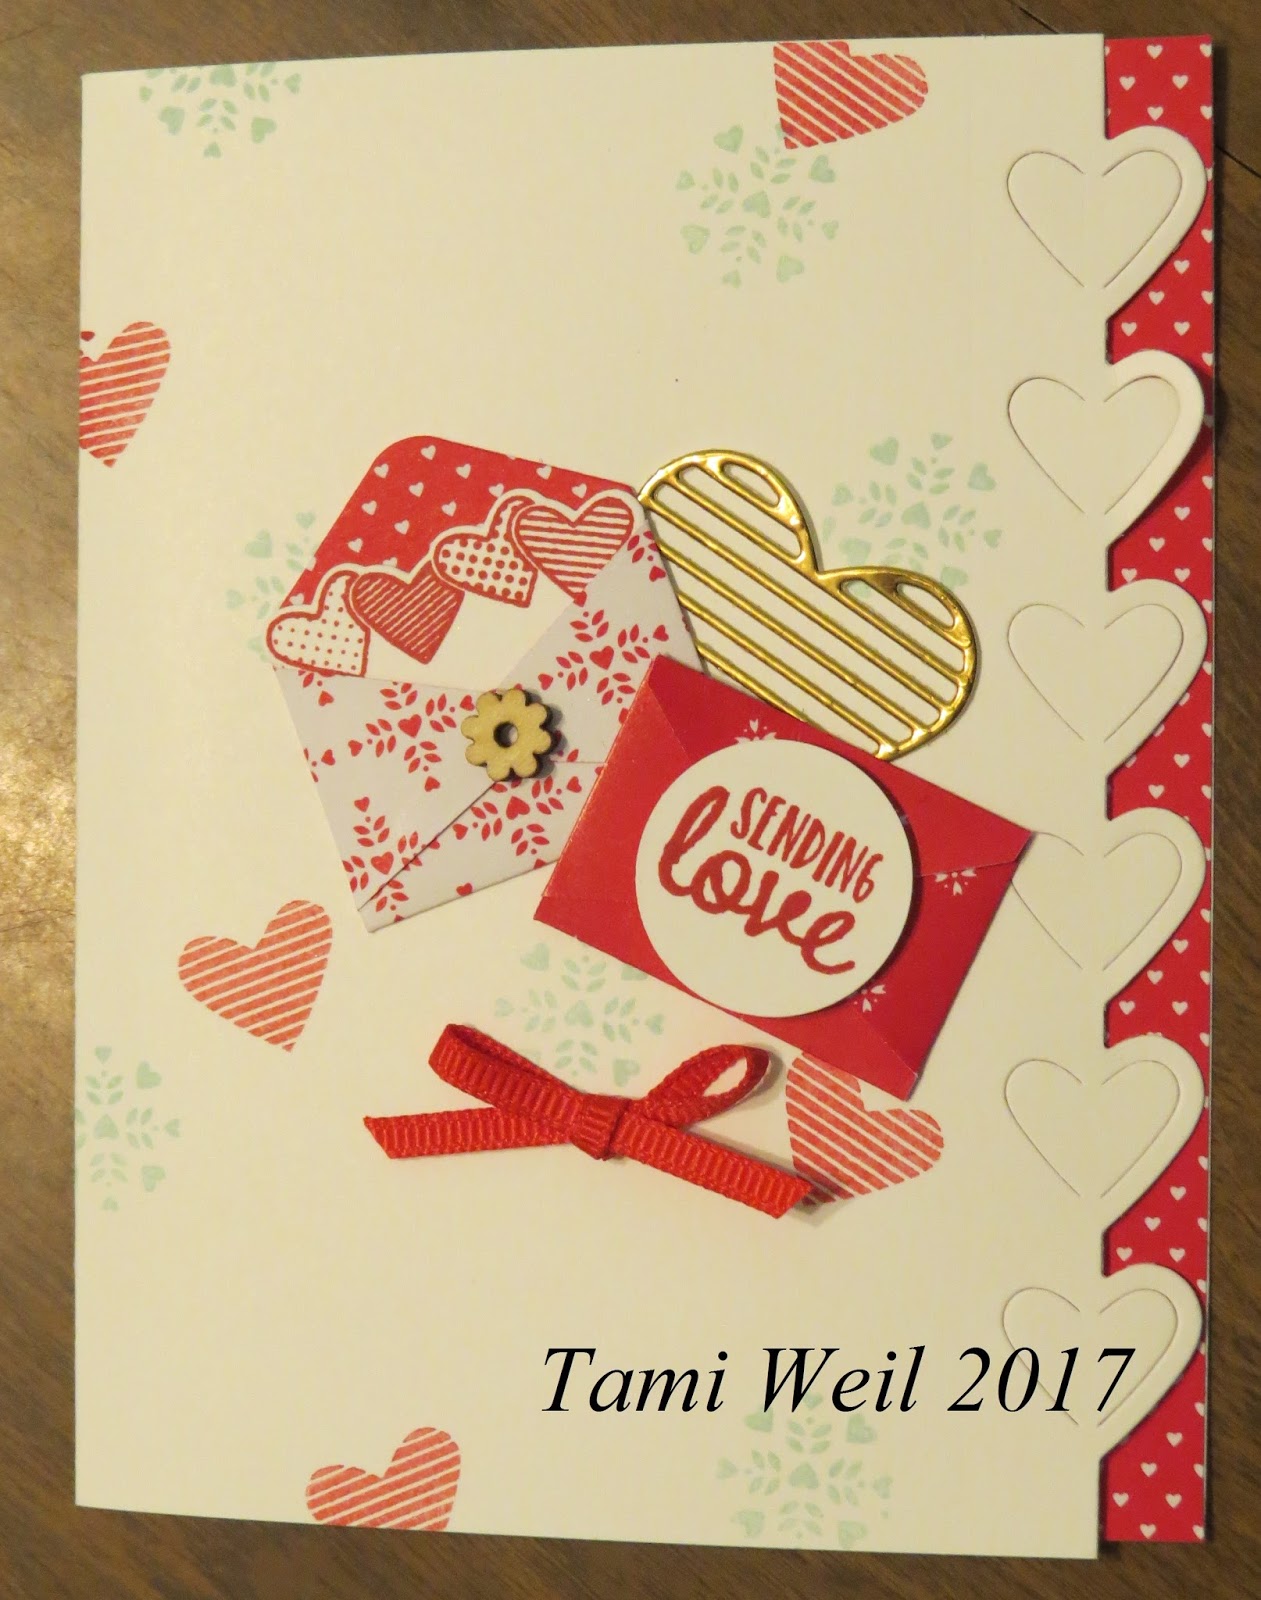
Sending Love Card


Supplies used: Sealed with Love stamp set, Love Notes Framelits Dies, Whisper White cardstock, Copper Foil sheets, Sending Love Designer Series Paper Stack, Sending Love Embellishments, Sending Love Ribbon Combo Pack, Real Red and Pool Party ink pads.

Nailed It Card


This stamp set is one I received at the On Stage event in November as a prize patrol gift.  I have to be honest and say that when I first looked at it I was a bit underwhelmed. Once I got it home and started playing with it I fell in love.  This is a perfect stamp set to make very cool masculine cards.  It comes with a matching die set (which I love), but I somehow missed ordering it in time, so all of the tools were fussy cut.  They all cut out very easily. The new hexagon embossing folder is awesome and I love the look of it using the Silver Foil paper. The tools are all colored using our new Watercolor Pencils with Blender Pens.

Supplies used:  Nailed It stamp set, Crushed Curry, Basic Black, and Whisper White cardstock, Silver Foil paper, Memento Tuxedo Black ink pad, Urban Underground Specialty Designer Series Paper, Hexagons Dynamic Textured Impressions Embossing Folder, Urban Underground Embellishments, Watercolor Pencils, Blender Pens, Classic Label Punch.

Hey Chick Card


This card is made with the Hey Chick stamp set from the Sale-a-bration catalog that also starts today. With each $50 purchase you can earn one free item from this catalog. This stamp set has three very cute chickens and an egg.  I think this is the most fun stamp set in the Sale-a-bration catalog.  I used the hexagon embossing folder again, but this time I didn't emboss with it.  I inked up one side and used it as a stamp.  Come join us this Saturday to see how it's done.

Supplies used: Whisper White, Real Red, and Crushed Curry cardstock, Basic Gray ink pad, Memento Tuxedo Black ink pad, Watercolor Pencils, Blender Pens, 5/8" Burlap Ribbon, Layering Squares Framelits Dies, Hexagons Dynamic Textured Impressions Embossing Folder.

Sunday, July 19, 2015

Stampergyrl July Sketch Challenge

Stampergyrl July Sketch Challenge

It's that time again.  Here is my entry for the sketch challenge over at stampergyrl's blog.


You can see her challenge here:  stampergyrl  I used the Stampin' Up! Mini Treat Bag thinlits to participate in this month's challenge.  This project was a lot of fun to make.


Built for Free Using: My Stampin Blog

Friday, June 26, 2015

June Stamp Club - Card #4

Crazy About You Stamp Set & Hardwood Background Stamp


And here is card number 4


Supplies:  Hardwood Background Stamp & Crazy About You stamp set; Early Espresso, Crumb Cake & Very Vanilla cardstock; Early Espresso Classic Ink Pad; Hello You Thinlits dies; stampin dimensionals; white glue.

Wednesday, June 24, 2015

June Stamp Club - Card #3

You've Got This Stamp Set


Here's card number 3


Supplies:  You've Got This stamp set; Whisper White & Watermelon Wonder cardstock; Smoky Slate, Watermelon Wonder & Stazon Black ink; Blender Pen; Watermelon Wonder 1" Dotted Lace Trim; stampin dimensionals; 2 1/2" Circle Punch.

Monday, June 22, 2015

June Stamp Club - Card #2

Happy Birthday, Everyone Hostess Stamp Set


Here is card #2.  Supplies:  Happy Birthday, Everyone stamp set; Whisper White & Real Red cardstock; Night of Navy Classic Ink Pad; Real Red 1/4" Cotton Ribbon; Hearts & Stars Decorative Masks; sponge dauber; rhinestones; sponge daubers; glue dots.


Saturday, June 20, 2015

June Stamp Club - Card #1

Tag Talk & World Map stamps


This is one of the cards we made on Saturday night in our stamp club. This is a nice masculine birthday card. Our stamp club is on the 2nd Friday night of each month. Come join us and make some cool cards!


Supplies:  World Map Background Stamp & Tag Talk stamp set; Whisper White, Pacific Point & Basic Black cardstock; Memento Tuxedo Black and Delightful Dijon ink pads; Lucky Stars embossing folder; Deco Labels Colllection Framelits; Label Bracket & Scalloped Tag Topper punches; Pacific Point 3/8" Stitched Satin Ribbon; stampin dimensionals.

Built for Free Using: My Stampin Blog

Wednesday, June 17, 2015

Stamper Gyrl Sketch Challenge

My sis over at Stamper Gyrl is having a monthly sketch challenge.  Here is my entry.  Be sure to check out her blog and the challenge here!

This is my entry:


Supplies:  Whisper White & Cucumber Crush cardstock; In Color DSP; Cucumber Crush, Watermelon Wonder & Delightful Dijon classic inks; Stazon black ink; 2 3/8" Scallop Circle Punch; Tree Builder Punch; stampin dimensionals; rhinestones.

Sunday, June 14, 2015

New 6 x 6 Paper Stacks

I think I may have a new favorite designer paper, but then I'll probably have a new favorite with every one that I use from the new Stampin' Up! catalog.  This one is a 6x6 paper stack and is called Pretty Petals. The stack contains 48 6x6" double sided sheets.  That's 4 each of 12 patterns.  The patterns in this paper are all fresh and very pretty.


Care to guess which of these cards is my favorite?  The butterflies of course!  I'm not sure what it is about butterflies, but I just love them.  These cards also us the new Tin of Cards stamp set. This may be my new favorite set!  I just love the swirly border stamp, and the words in the set are wonderful also.  

If you would like to order the paper and/or the stamp set, you may do so from my online store.  Click here to shop now! If you don't currently have a demonstrator, I would love to be yours.  If you are in need of a catalog, please let me know and I'll get one out to you right away.

New Background Technique

New Background Technique


This card turned out so pretty!  The background is made with foil and it's an alternative to using the foil cardstock. We all have aluminum foil in our kitchen, right?


To make the background:  cut a scrap piece of cardstock to the size you want your foil piece to be.  It can be any color because you won't see it in the finished card.  Use a glue stick and cover the whole piece of cardstock with it.  Lay the foil on it (the foil piece should be larger than the cardstock piece so you can wrap it around to the back after gluing it down), shiny side up and brayer the whole piece.  This will smooth out the foil and make a nice shiny image. Wrap the edges around to the back, then emboss it with any embossing folder.  Attach to your card and finish as normal.  

Supplies for this card:  Wisteria Wonder, Elegant Eggplant, Garden Green and Whisper White cardstock; Petal Potpourri and Painted Petals (retired) stamp sets; Elegant Eggplant classic ink; Fun Flower, Extra Large Oval and 1 3/4" Scallop Oval punches; Lovely Lace embossing folder; rhinestones, stampin dimensionals and sponge.

Friday, June 5, 2015

New Catalog!

Here is my first card with the new 2015-2016 Stampin' Up! catalog.  


I love everything in the catalog and made this card for a design challenge over at Mojo Monday.  They are looking for new designers, and I would love to be chosen to be one of them! You can check out the challenge and the beautiful samples here.


This card is also a sneak peek for our June Stamp Club.  Come join us!

All supplies are Stampin' Up!

Supplies:  Petite Pairs stamp set, Basic Black & Very Vanilla cardstock, Timeless Elegance DSP, Floral Frames framelits, Decorative Dots embossing folder, Memento Black Ink, Metal Rimmed Pearls, Stampin Dimensionals.

Check out all of the new Stampin' Up! goodies on my website here.

Sunday, April 12, 2015

April Stamp Club

Here are the cards we made Friday night.  They were all a lot of fun to make.

This first one was made using the newer photopolymer stamp set "Lovely Amazing You".  It's a very fun set to play with.  Cardstock:  Whisper White, Island Indigo, Tempting Turquoise, Pear Pizzaz.  Inks: Island Indigo; Tempting Turquoise, Pear Pizzaz.  Also used the large circle embossing folder and the Hearts Aflutter thinlits. Oh, and gold glitter paper.


This second one is made using the new Mini Treat Bag thinlits set.  Cardstock: Whisper White, Basic Black.  No ink involved, but it uses the new Spring Flowers embossing folder and the Back to Black dsp.  Very fun to make and I love this new die!


This card is made with the Vivid Vases stamp.  Basic Black and Whisper White cardstock.  It also uses the Zig Zag embossing folder and the envelope punch board (for the bow). It has an acetate piece in the middle to showcase the vases.  The vases were colored with markers.


This last card was simple and easy, but looks very elegant.  The cardstock is Whisper White and Pink Pirouette. It uses the scallop border punch and butterfly embosslits, with the Love & Sympathy stamp set.

Tuesday, March 31, 2015

Holiday Bazaar Gift Items


A few years ago I started participating in Holiday Bazaars again.  I normally wait until a couple of months before the bazaars start to begin thinking about what items I need to make to sell.  Each year I tell myself that I need to start at the beginning of the year and make some items each month so by the time the bazaars get here I'll already have a supply of items to sell.  The way that I decided to do that this year is to evaluate the cards that we make in our monthly stamp club to see which ones would be good as a gift set.  Here are photos of the first set of the year to make the cut for the bazaars.


These cards are from our January Stamp Club and use the Lotus Blossom stamp set.  They were a lot of fun to make.

Sunday, March 29, 2015

Stamping Retreat

I went to a stamping retreat at the Grunewald Guild retreat center in Leavenworth WA last month.  It was a wonderful weekend of stamping and the weather was beautiful. This is a photo of the lodge we used for our stamping time.  It has windows on 3 sides and was an awesome space to stamp in. The only drawback to this place was the drive.  It's 6 hours from Salem.  That's a long time in a car!


This photo is the cabin that I stayed in.


Sunday, February 22, 2015

February Stamp Club


Here are the cards we made this month:


This card was made using the Butterfly Basics bundle from the Spring Catalog.  The card itself was cased from brandyscards.com.  She always has beautiful cards.  The supplies used were Whisper White & Pacific Point CS; So Saffron, Old Olive, Pacific Point & Early Espresso Inks; and a rhinestone for the butterfly.

This card was cased from Karen Titus and you may see hers here (you will need to scroll down a bit): click here

The supplies used were Whisper White & Real Red CS; Real Red Ink; Stacked with love DSP; You Plus Me Stamp Set; Sweetheart Punch; and rhinestones. This card was quick and easy and a lot of fun to make.  You could make this card as a thank you or thinking of you card also.

This card was made using the Irresistibly Yours DSP in the Sale-a-bration catalog. This paper is very elegant and you can get it for free until March 31, 2015 with a $50 purchase from Stampin Up!.

The supplies used were Whisper White & Calypso Coral CS; Crazy About You stamp set; Hello You thinlits dies; Stazon black & Daffodil Delight inks; Daffodil Delight & Calypso Coral reinkers; Spritzer Bottles, and rhinestones.

This last card design came from one of the Class in a Flash tutorials.  It was lots of fun to make also.  The supplies used were Whisper White & Basic Black CS; Hello You thinlits dies; Crazy About You stamp set; Bermuda Bay Ink; Bermuda Bay Sequin Trim; Large Polka Dot Embossing Folder; Birthday Bash Designer Washi Sheets; & Bermuda Bay 1/8" Taffeta Ribbon.

As always, you may purchase any of these supplies from my website here

Thanks for looking and happy stamping!